Ready for an installment of our easy, cute drawing ideas that may be a tad unexpected? That’s right: it’s time for umbrella drawing!
As some background about the person writing this lesson, I am an artist and teacher named Lillie, and I hand-draw each and every illustration on this site, with love. My recent favorite was our mushroom drawing tutorial! Ready for today’s fun? Let’s go!

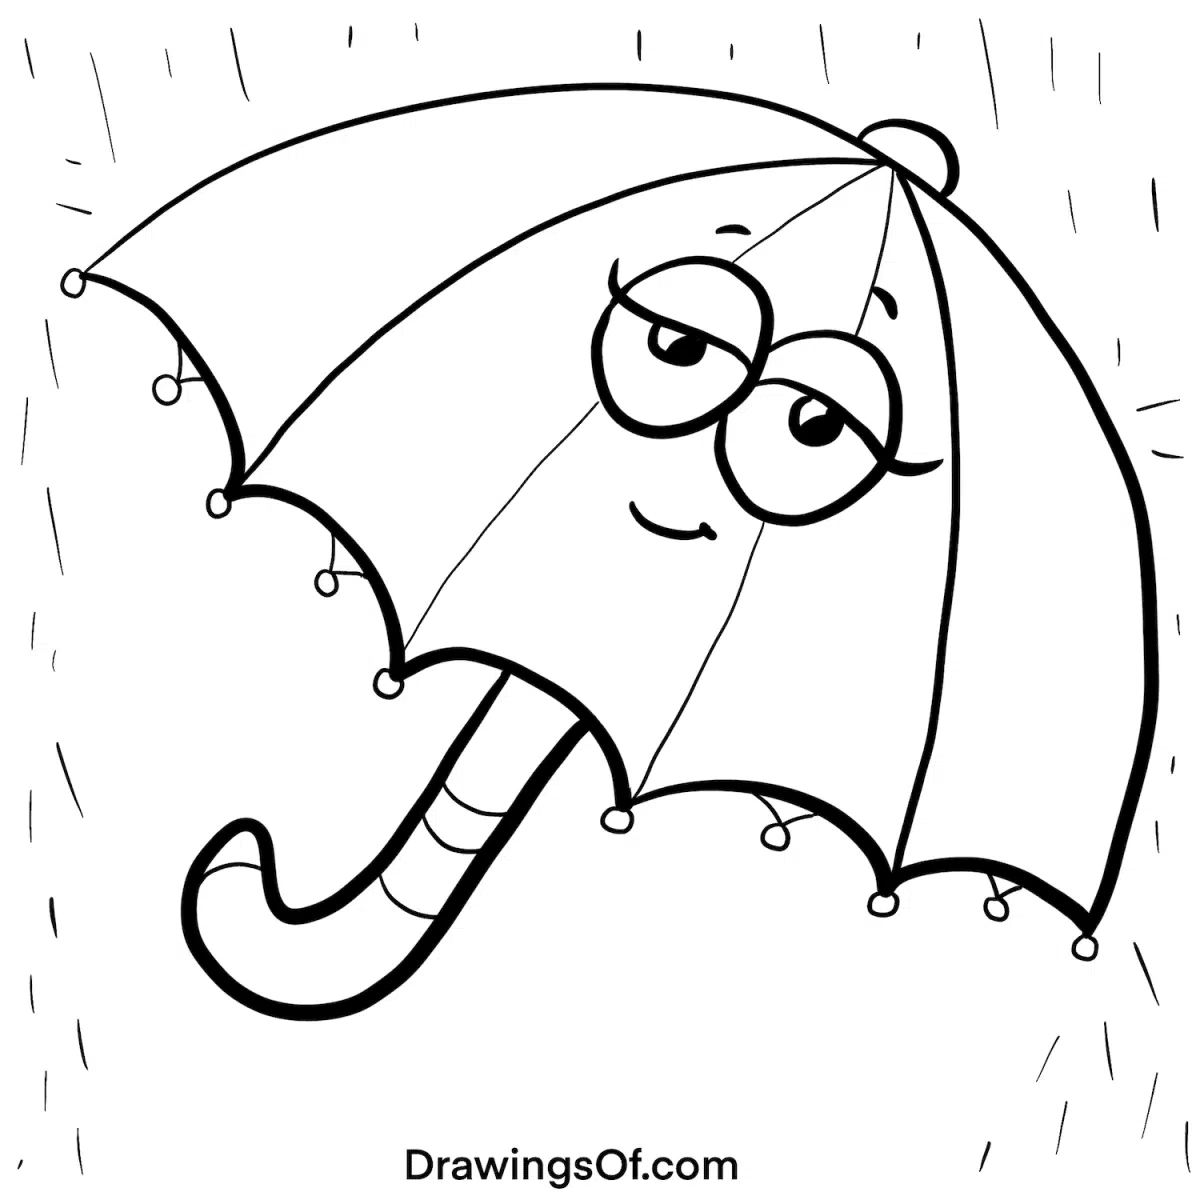
Umbrella Drawing
As I explained with our snowman drawing, please feel free to modify or alter any of the instructions in this tutorial. Creative expression is all about making personal choices that are unique to YOUR desires!
1. Start with a pencil sketch.
As we found with drawing a gift box, starting with an erasable pencil sketch is essential for cartoons that require precise angles, like this one does. As you can see in my time-lapse art video below, I began our cute umbrella with a semicircle shape, then played around with the spacing of each upside-down “U” at the edge of the umbrella.
It took me MANY tries to get this right — along with the shape of the handle, which brought back flashbacks to candy cane drawing mistakes. Thank goodness for being able to erase!

2. Draw the umbrella “ribs” and “tips.”
The bent metal sticks that hold the umbrella’s canopy are called “ribs,” and their ends are called “tips.” The tip at the very top of the contraption is called the “end tip.”
Once you have a basic sketch of the umbrella, begin inking in the lines from the end tip to the bottom tips. This process is very similar to making the ridges in our pumpkin drawing. If you choose to have cute cartoon eyes in your sketch (as I do for everything), it can be a little tricky to make the line match from the top to the bottom. Be patient and use your eraser liberally.
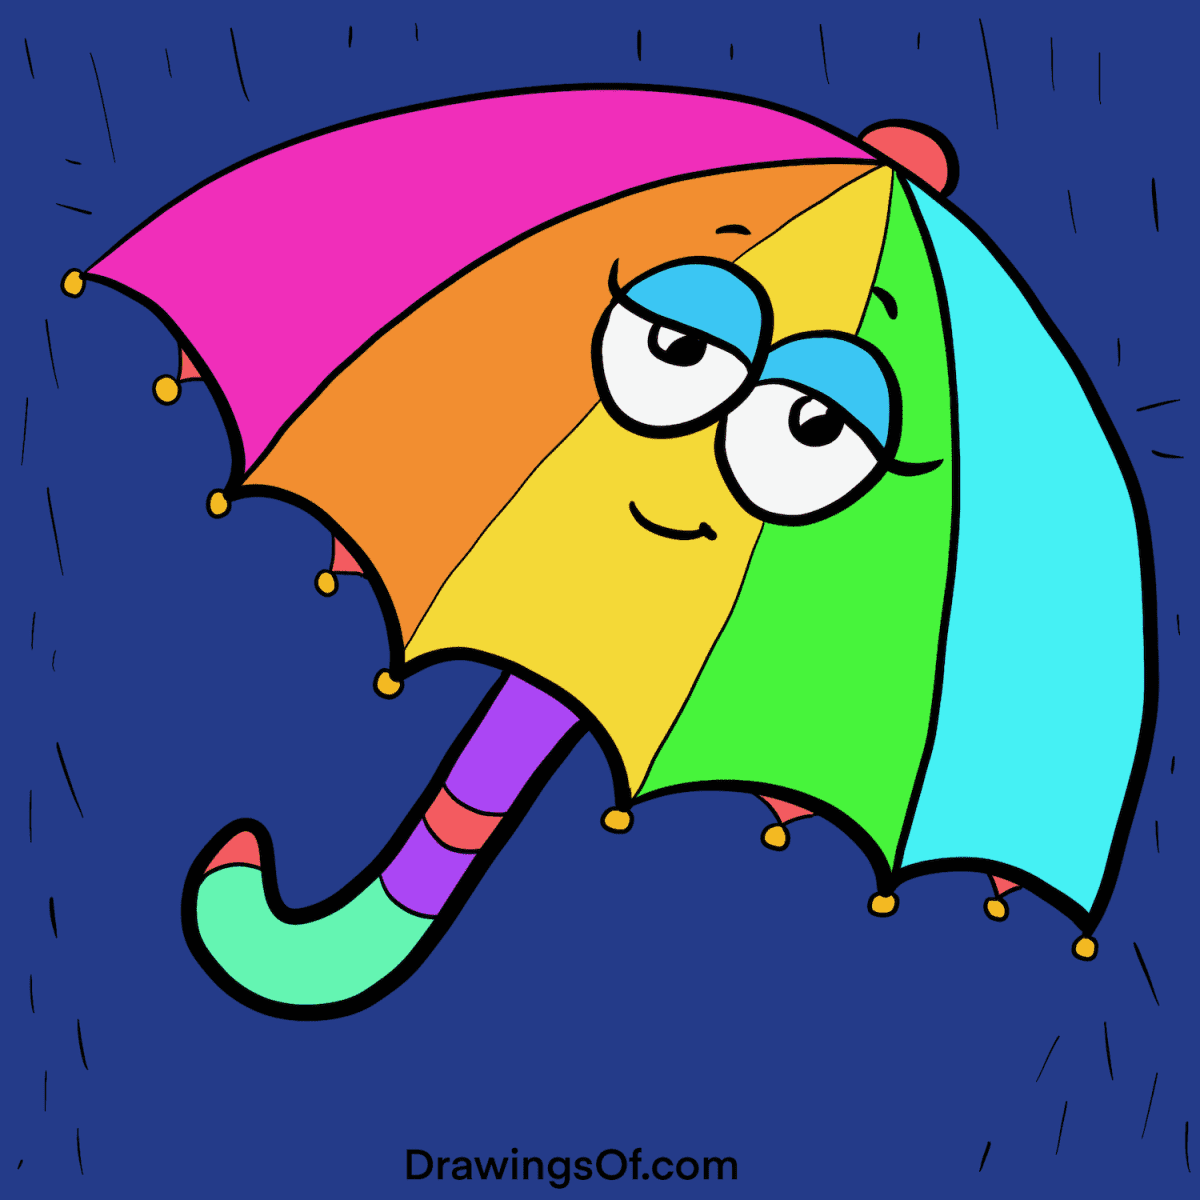
3. Choose bright and cheerful colors for our umbrella drawing.
Because the background of our drawing will be dark and stormy, pick bright and cheerful colors that contrast with that well, so the umbrella appears to burst out joyfully at the viewer. Since the opposite of orange is blue, and your background will likely have some blue in it, I’d suggest using at least some orange in the canopy of the umbrella.

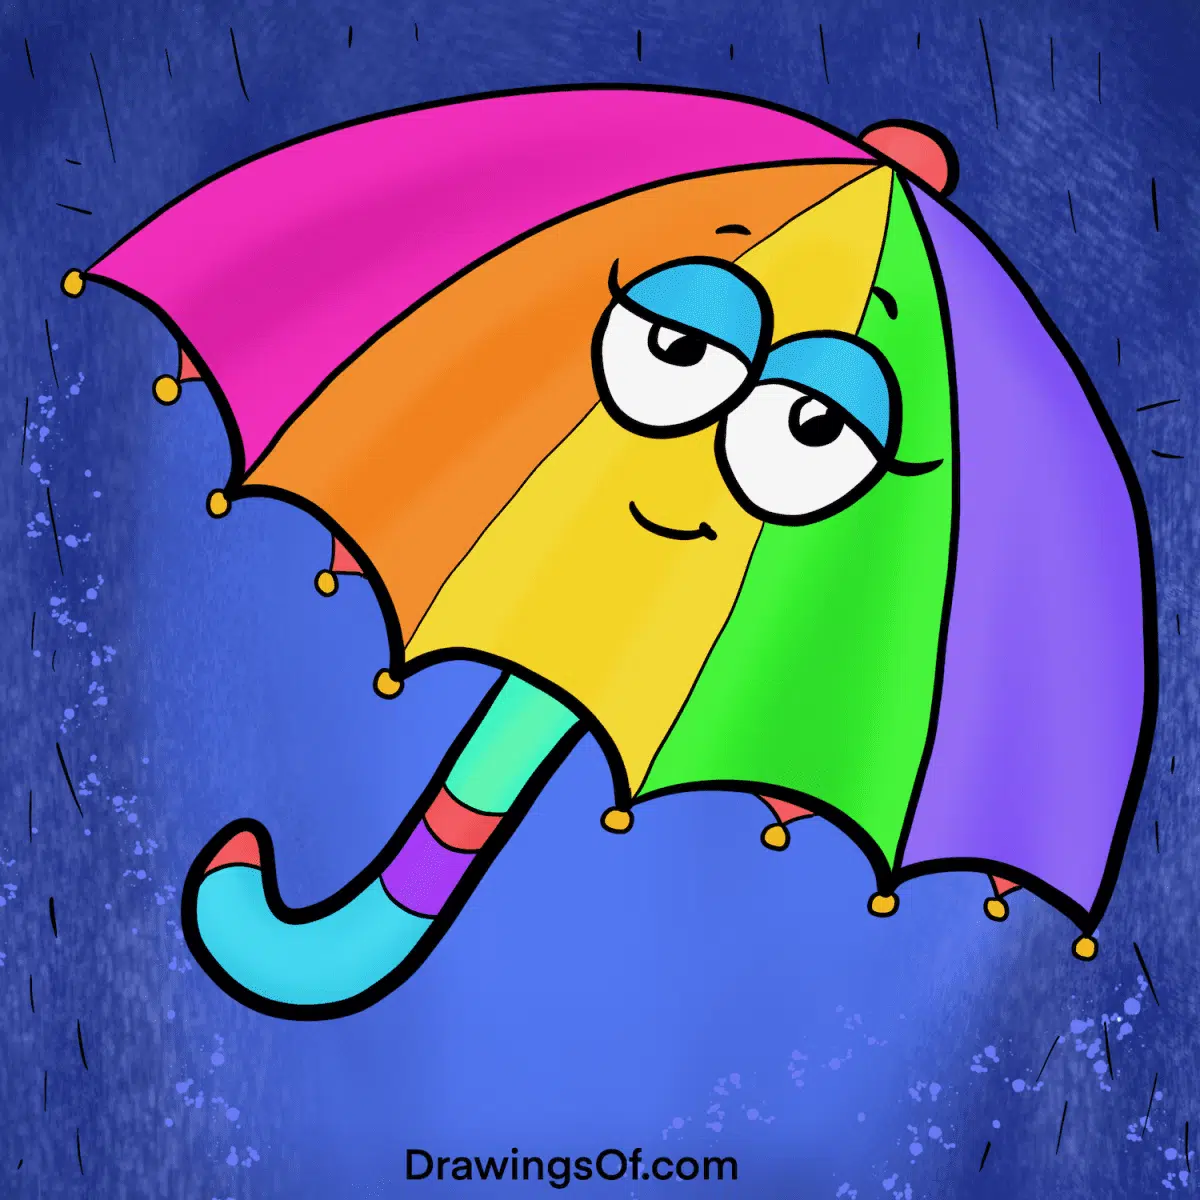
4. Be mindful with shadows and highlights.
Shading and highlights help art look three dimensional — but be careful with this drawing, because they’re not where you might expect. In our cloud drawing, for example, there was a clear pattern of the shadows being on the sides and the highlights in the middle — but with an umbrella, you need light highlights along each of the “ribs,” and darker shadows in each of the canopy stretches between to give the slightly undulating effect.
5. Add rain in back, but not under the canopy.
To show the protective shielding power of our umbrella, draw stormy rain all around it, yet dry sanctuary underneath. Check out my lesson on how to draw the wind for more background ideas. Ready to see the time-lapse video of my art process? Here it is…
Umbrella Drawing, in Sum
I hope you’ve enjoyed this cute, easy umbrella drawing tutorial. What cute drawings should I illustrate and teach next? Do share!
Want more? Check out my round-up of creative drawing prompts, and a whole set of easy drawing ideas!

The author and artist, Lillie Marshall, is a National Board Certified Teacher of English who has been a public school educator since 2003, and an experienced Reiki practitioner since 2018. All art on this site is original and hand-drawn by Lillie. She launched DrawingsOf.com Educational Cartoons in 2020, building upon the success of her other sites, AroundTheWorldL.com (established 2009), TeachingTraveling.com (founded 2010), and ReikiColors.com. Subscribe to Lillie’s monthly newsletter, and follow @WorldLillie on social media to stay connected!